
Before arranging basement leak repair in Mississauga, start with the water’s pattern rather than the nearest stain or crack. Water can travel behind a finished wall, along a joint, or below flooring before it reaches the spot you can see. Recording where it first appears, when it happens and what equipment is nearby gives us a better starting point for identifying the route and defining an appropriate repair scope.
A wet basement can involve a foundation crack, water at a basement window, drainage near the footing, a sump or discharge concern, plumbing, or reverse flow through a drain. These routes need different investigation and repair approaches. You do not need to choose a method before requesting an assessment.
Start with the first visible water, not a guessed cause
The first wet location is useful, but it is not always the entry point. For example, a puddle beside a wall may have travelled from a higher opening behind drywall, while water at the floor edge can be related to drainage near the foundation or another concealed route.
From a safe, dry position, note whether the wall becomes wet before the floor, whether moisture appears beneath a window, and whether the issue follows rain, snowmelt, fixture use, several damp days, or a power interruption. If you have a sump, note changes in water level, cycling or noise without opening the pit or touching wiring. Our guide to water in a basement after rain explains why timing and the first wet area matter.
Match the symptom to the right question
| What you notice | What needs to be considered |
|---|---|
| A wet line along a wall crack | The wall material, crack condition, access and whether another nearby route is involved. |
| Water at the wall-floor joint | Foundation drainage, floor-edge access and the route available for collected water. |
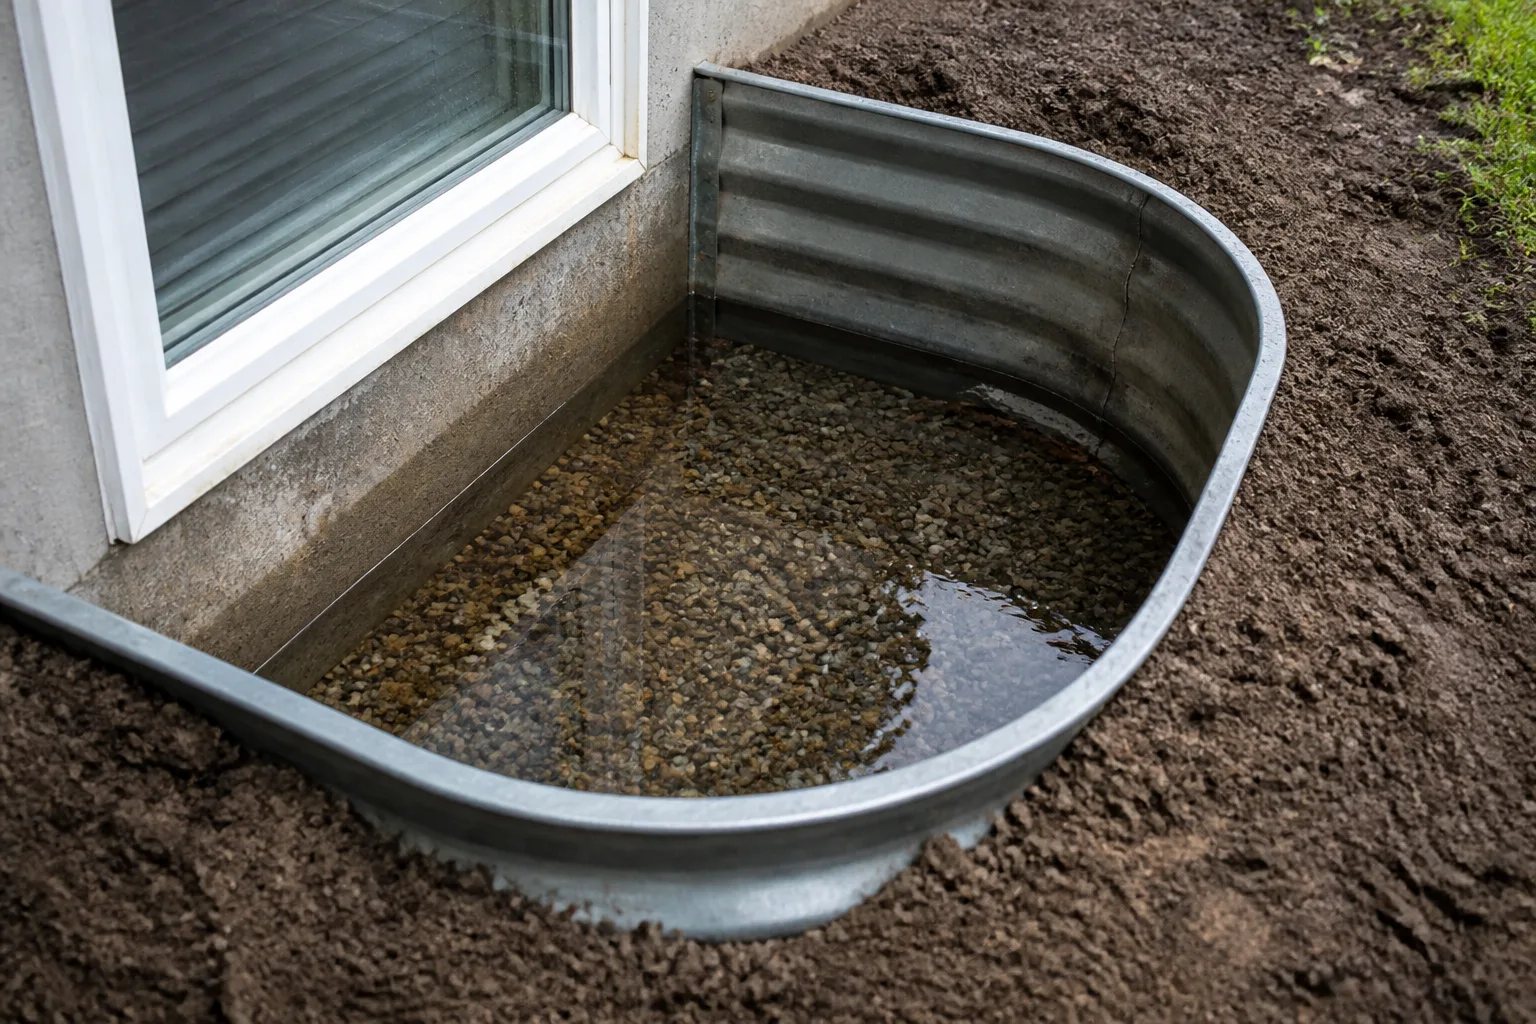
| Water below a basement window | The window well, surrounding grade, drain connection and the window opening itself. |
| High water near a sump or changed pump operation | The pit, float clearance, incoming drainage, power and discharge route. |
| Water rising through a floor drain | The affected drain and possible reverse flow, which is different from water passing through a foundation wall. |
| Widespread dampness without a flow path | Humidity, cool surfaces, ground vapour and concealed liquid-water entry. |
Condensation and a leak can look similar, particularly on cool pipes, windows or walls. A dehumidifier removes moisture from the air under its operating conditions, but it does not seal a crack or correct an unsuitable drain. Conversely, sealing a water-entry route does not automatically resolve high indoor humidity. See our guide to basement moisture, condensation or a leak for the practical distinction.
What to record before a leak assessment
A short record helps connect an intermittent problem to the conditions that precede it. Photographs can document what is visible, but they cannot show concealed pathways, confirm a drain connection or establish structural stability.
Before an assessment
Create a simple water-pattern record
Record only what you can observe safely. A few clear details are more useful than trying to diagnose the repair yourself.
- Note where water first becomes visible: wall, floor edge, window area, drain or sump.
- Record when it appears: during rain, after snowmelt, after fixture use, after damp weather or during a power interruption.
- Describe whether the wall, floor or window area becomes wet first.
- List known pumps, drains, previous repairs and any changes in their operation.
- Keep safely taken photographs and any previous invoices or drawings available.
Previous invoices, drawings or written details of known waterproofing, drain, pump or crack work can also help explain the existing arrangement. There is no need to scrape a wall, drill into a crack, remove drywall or move electrical equipment to prepare for an enquiry.
Safety first
Do not investigate water near electrical equipment
Keep clear of water near outlets, electrical equipment or a panel. Do not enter standing water or reach into a wet sump pit; use the appropriate emergency, utility or electrical-safety response first.
Why a crack is not automatically the repair target
A visible crack can be a route for water, but it is not a complete diagnosis. Water may also follow a construction joint, service penetration or nearby opening. Poured concrete and masonry can present different repair conditions, and paint, coatings, earlier patching and interior finishes can affect what can be inspected or reached.
Where an identifiable poured-concrete crack is the assessed route, a focused foundation crack leak repair may be considered. The repair purpose is water sealing. It does not, by itself, determine why a crack formed or establish that a foundation is structurally sound. If you have noticed a crack changing, wall displacement, recurring damage or other movement concerns, raise that separately so the need for a suitably qualified professional can be considered.
When drainage, windows or pumps change the scope
Repairing the route means following water through the connected arrangement. If water concentrates below a basement window, the well, nearby surface water, drain connection and window opening have separate roles. A cover can reduce debris or direct rainfall, but it does not make an unsuitable drainage connection work. Our window well drainage and repair page outlines the questions that help separate those components.
Water at the floor edge can justify investigation of foundation drainage, often called weeping tile. That symptom alone does not prove the entire system has failed. A foundation drain’s location, condition and outlet all matter. An interior perimeter collection system is also different from an exterior foundation drain, even though both may be called weeping tile in casual conversation.
If a sump is part of the arrangement, the pump is only one component. The pit, incoming connections, float, check valve, discharge route, power and maintenance access all affect how the system operates. Similarly, water rising through a drain should not be treated as a wall-sealing problem. It requires attention to the affected pipe and possible reverse flow.
Interior and exterior waterproofing solve different parts of a problem
Interior basement waterproofing generally collects water near the inside perimeter and directs it to an assessed outlet, often through a sump. It can be considered when exterior access is difficult or when the water-entry pattern supports an interior collection approach. It manages incoming water rather than creating a barrier on the outside face of the foundation.
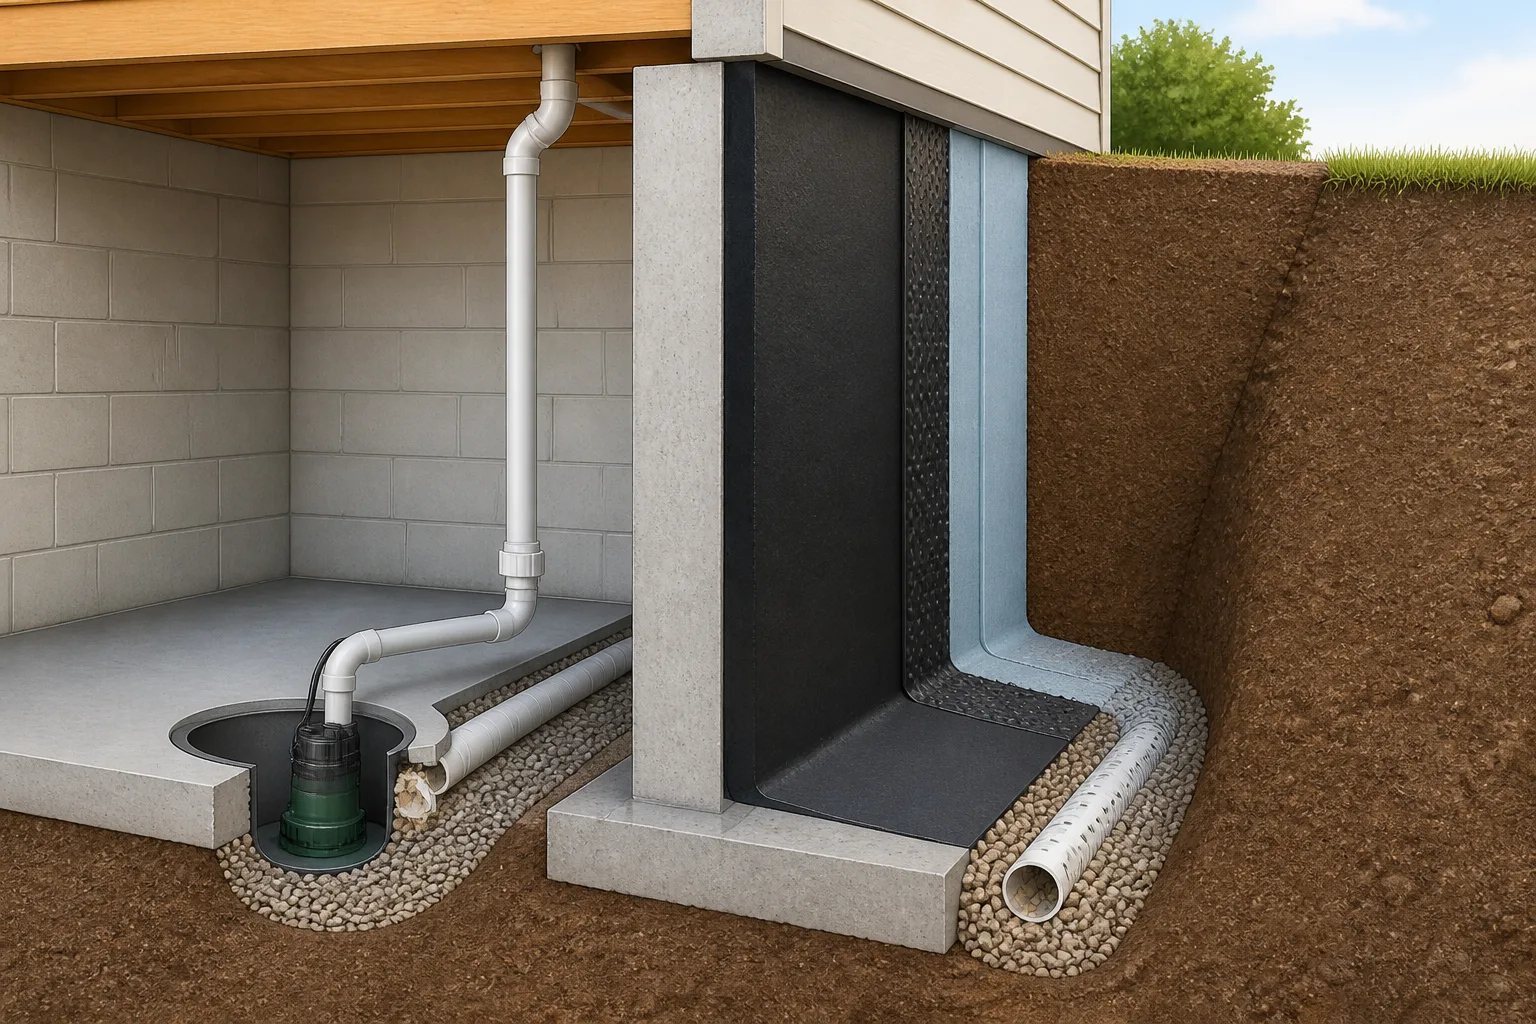
Exterior waterproofing involves access to the outside wall and related drainage details. A complete exterior scope can include excavation, wall preparation, a specified waterproofing system, protection, drainage and restoration. Driveways, decks, narrow side yards, utilities, property boundaries and adjacent surfaces can affect what is practical.
Neither approach is automatically the better choice. The decision should follow the observed water route, foundation condition, available access, existing drainage and the parts of the property that would need to be opened and restored. Our interior versus exterior waterproofing comparison explains these tradeoffs in more detail.
Ask for a scope that explains the repair
A useful estimate connects proposed work to an identified finding. It should state the repair area or entry route, what was inspected, what remains concealed, the required access, components or drainage connections, and the restoration included or excluded.
For a finished basement, clarify which finishes need to be opened, how belongings and adjoining rooms will be protected, and who is responsible for reinstating drywall, trim, flooring or paint. For exterior work, ask about excavation access, disposal, backfill and the boundaries of surface restoration. Backfill is not necessarily the same as replacing landscaping, paving, a deck or other disturbed surfaces.
Compare equivalent scopes rather than just comparing totals. Our waterproofing quote-comparison checklist can help organize questions about access, materials, connections, restoration, exclusions and written terms.
Know when the issue needs a different response
If water is near electrical equipment or a panel, keep clear. Do not enter standing water, touch electrical equipment, or reach into a wet sump pit. Follow applicable electrical flood-safety guidance and contact the appropriate emergency or utility professional. Our assessment service is not emergency dispatch.
Water that follows fixture use rather than weather can point to plumbing or another building-service issue. Water rising through a drain may call for an appropriate plumbing investigation. Where contaminated water, damaged materials or mould concerns are present, define whether another specialist should be involved rather than assuming a leak repair resolves every affected condition.
The most useful next step is a clear description of what you observed. We assess visible water patterns, foundation and access, along with existing drainage, equipment and discharge, before defining the work. That approach helps distinguish a targeted repair from a broader drainage or waterproofing discussion.
Helpful answers
Frequently Asked Questions
Discuss the water pattern before choosing a repair
Tell us where water first appears, when it occurs and what drainage or pumping equipment is already in place.